Related Posts
No related posts found.
Eat Clean, Feel Great – Enjoy 10% OFF on Your First 2 Meals!
Just Dropped: Your Next Favorite Meal Is Here!
Home-Cooked Comfort, Made With Mom’s Touch. Order Now
Register to get discount on your first 2 orders!
 100% secure. No spam ever.
Your cart is empty.


Published on December 09, 2025
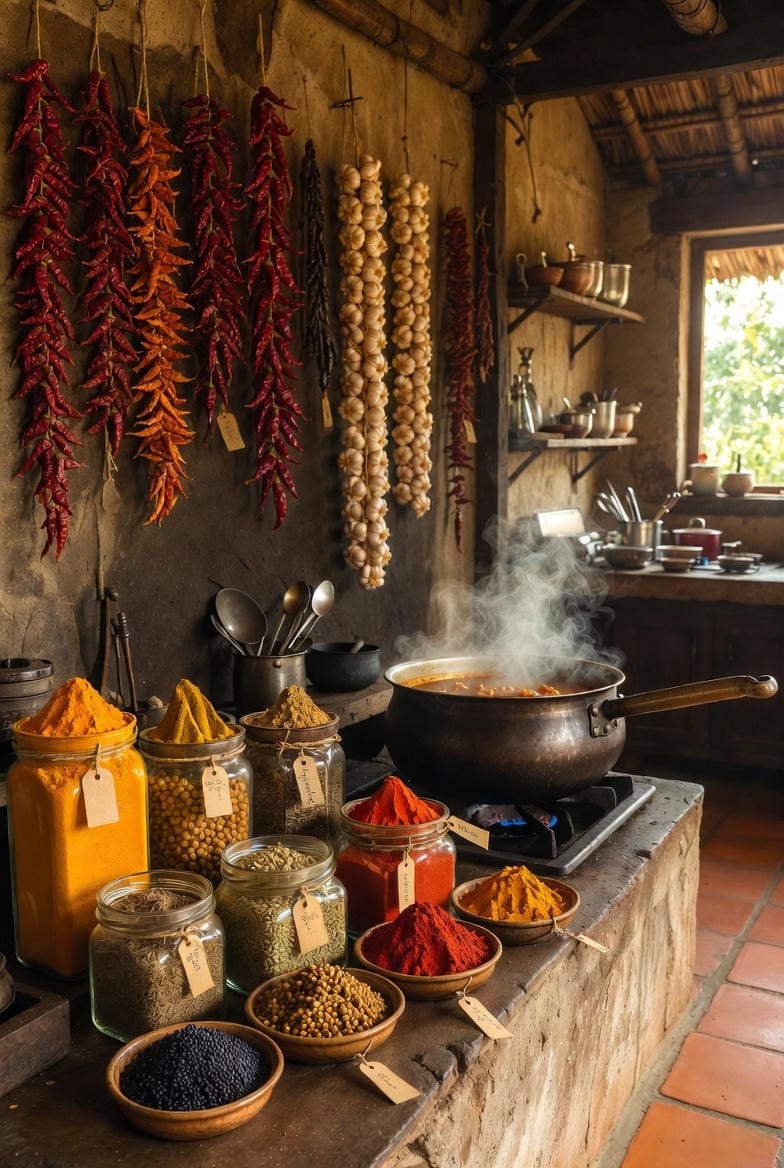
Discover the essential cooking techniques that give Indian curries their rich depth and complexity
Indian curries aren’t just “throw everything in a pot and hope.” The magic lies in a handful of deliberate techniques that Indian home cooks have perfected over centuries. Master these six moves and you’ll never make a flat, one-note curry again.
1. Bhunna (The Art of Patient Frying)
This is the soul of North Indian cooking.
You cook the masala (onion-tomato-spice paste) on medium heat, stirring constantly, until the oil separates and the raw smell disappears. It can take 15–25 minutes, but this step caramelises the onions, deepens the tomatoes, and rounds out the spices. Skip it and your curry will taste harsh and raw. Embrace it and you get that restaurant-style richness.
Pro move: When the masala starts sticking, splash in a tablespoon of water—it deglazes the pan and keeps cooking without burning.
2. Tadka/Tempering (The Flavor Bomb)
Hot oil + whole spices = instant aroma upgrade.
Heat ghee or oil until shimmering (sometimes almost smoking), then toss in cumin, mustard seeds, dried red chillies, curry leaves, or hing. They sizzle, pop, and release essential oils in seconds. Pour this over finished dal or curry at the very end. South Indian sambhars and rasams live or die by a perfect tadka.
Golden rule: Never burn the tadka—30 seconds too long and it turns bitter.
3. Layered Spicing (Spices at Different Stages)
One blast of spice powder = amateur hour.
Indian cooks add spices in waves:
- Whole spices → at the beginning in hot oil (cumin, cardamom, cloves)
- Ground spices → after onions soften (turmeric, coriander, chilli)
- Finishing spices → in the last 2 minutes or as tadka (garam masala, kasuri methi, fresh coriander)
Each stage extracts a different flavor note. Do it right and your curry has a beginning, middle, and lingering end.
4. Dhungar (The Smoky Secret Restaurants Don’t Want You to Know)
Want that tandoor-like smokiness at home?
Place a small steel bowl inside your finished curry. Heat a piece of charcoal until red-hot, place it in the bowl, drop a clove or teaspoon of ghee on it, and immediately cover the pot. 5–10 minutes later—open the lid and inhale pure butter chicken / dal makhani heaven.
5. Cooking with Dairy (The Silky Transformer)
Yoghurt, cream, cashew paste, or coconut milk aren’t just for richness—they balance heat and acidity.
Trick: Whisk yoghurt with a little water and a teaspoon of besan (gram flour) before adding, then stir constantly on low heat. This prevents curdling and gives that velvety texture you can’t get any other way.
6. The Final Simmer (Dumm) on Low Heat
The quiet step that ties everything together.
After all ingredients are in, lower the heat, partially cover, and let the curry gently bubble for 10–30 minutes (sometimes longer). Flavors marry, the sauce reduces and clings to the protein or vegetables, and you achieve that thick, glossy look.
Restaurant cheat: Many places seal the pot with dough to trap steam—hence the term “dum pukht.”
The Truth
You don’t need 25 spices or a recipe with 40 steps. You need these six techniques, practiced with patience and love.
Next time you make curry, slow down. Listen to the sizzle. Watch the oil separate. Inhale the tadka. Give it that final gentle simmer.
That’s when the magic happens—and your kitchen starts smelling like your favorite Indian restaurant ever wished it could.
Which technique are you trying first—bhunna or dhungar? Tell us in the comments! 🔥

Authentic Indian veg meals, ready to eat & delivered fresh! Order now and savor the taste of home.


